runnyrunny999 rightfully said, "there's more to Japanese food than Sushi!"
How naive of us! While I love sushi, my absolute obsession to Japanese food is their endless versions of ramen. Oh there is so much to be said about their broth! The thing I admire about Japanese people, they truly take their time in perfecting a single thing. You've heard it takes a true sushi chef 10 years to make a perfect bowl of sushi rice. You've heard it takes a master sashimi chef years and years of practice to be able to choose the best tuna at the fish market auction. Japanese people hold quality to the highest esteem. Their patience in perfecting one quality is truly admirable.
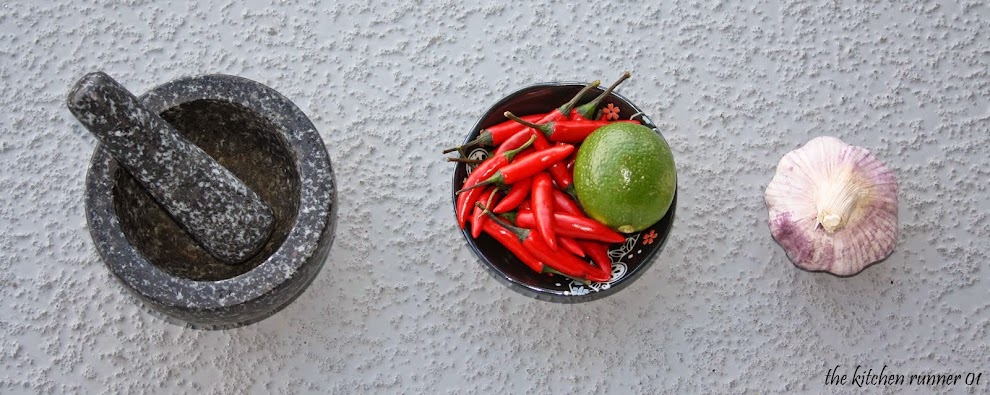
Since this will be my first attempt to make Japanese ramen, I didn't want to go too the extreme and make a complicated broth like Tonkotsu (a milky pork broth)/ Miso is pretty simple but I am determine to make it quite traditional. Japanese flavours tend to be very dimensional, full of layers, so while a dish may be simple, it requires quite a number of steps. So lets get right to it!!
First, lets make some toppings. :)
Marinated soft boiled egg
In a small sauce pan, add 1/4 cup of water, 3-4 tbsp of soya sauce, 1 1/2 tbsp of brown sugar, 1 tbsp of mirin and a green tea bag. Bring all ingredients to a soft boil and turn of the heat. The purpose of this is to cook out the alcohol of the mirin and melt the sugar. Set aside pan and allow to cool with the tea bag still inside.
In another pot, place 4 eggs in a pot of cold water, heat until boiling and turn of the heat. Cover for 8 minutes. (no more than that!) and quickly dump eggs in a cold bath or rinse in cold running water to immediately cool down. Peel out the shells, rinse the eggs to ensure no shells remain and pat dry.
Pour the sauce in a sandwich bag and drop of the eggs in and allow the eggs to marinate for at least several hours.
This is my version :D and it was delicious. :D

Japanese style Char Siu
Char Siu is originally a chinese dish but the Japanese has adapted a different version. Although it is safe to say nothing beats the chinese version, I am still determine to make the Japanese version. Which is a completely different in taste and style.
First, heat a flat pan to high heat. (remember to turn on the vent!) While the pan is heating, pat dry your slices of pork belly. You can get this at any asian grocer. Once the pan is hot, brown both sides of pork. Salt and pepper. Brown less than 2 mins each side and place on paper towel plate. Repeat process until all pork is browned. Allow pork slices to cool down enough to handle and cut into slices. Set aside.

Lets make a broth! This is where the pork will spend some quality time. :D
In a pot, add 3-4 cups of water, throw in the 3-4 stalks of green onion, 1 tbsp of ginger, 2 crushed cloves of garlic, 1 tbsp each of mirin and soya sauce. Heat. Once the liquid is boiling, turn to low heat, the lowest level on your stove. Add your sliced pork into this bath. :) Place a heavy bowl on top of pork. Cover pot and allow to simmer on low heat for 2hrs.

After the pork has bathed in the yummy liquid for 2hrs, turn off heat. Take out the pork and place onto serving plate and set aside. Save the liquid! This yummy broth will be part of your ramen broth. :D Strain broth with a sieve over a bowl. Throw away the flavorings. Set aside the broth.

Next, lets make....
Dashi stock!
I am aware there is a more convenient way of making dashi stock with the freeze dry "Hondashi." Problem is, the second ingredient is MSG! While I have no problem eating food that uses MSG (it is truly unavoidable with chinese food at restaurants!) I believe my personal kitchen should be free of MSG. Control the controllable. So no "Hondashi" for me thank you very much! While this traditional method of making dashi is considerably more expensive, I truly believe in pure flavours.
You will need to go to your asian grocery and purchase a pack of "Konbu" - a type of seaweed and package of "Bonito flakes" Be sure to purchase product of Japan! There are less expensive version made in China.... but personally, if I am going out of my way to make this broth, better to use quality ingredients.


Take out 1 konbu from package, cut in half and soak in warm water (about 3 cups) for at least 1hr. The konbu will expand and release the wonderful flavour of the sea. :) smell it! After 1hr, take out the konbu and place onto cutting board to cut into thin strips and set aside. Pour the konbu water into a clean pot and heat until liquid is at soft boil. Next, add one package of bonito flakes (about 1 hand full) and stir. While the liquid is simmering, prepare a sieve, place over a bowl. You will need to place a paper towel on the sieve. Simmer the liquid for about 2-3 mins and slowly pour liquid over the paper towel sieve. The towel will catch all the bonito flakes. and tada! You have made dashi stock! This stock is the base for many Japanese dishes. :D The flavour is quite unique and delicious on its own. Kinda like a full body clear fish stock. :D (no msg too!)
Oh we are getting closer to that bowl of ramen!
Let's boil the noodles! Honestly you can use any noodles you wish if you don't wish to splurge on the more expensive pre-made ramen noodles. At the asian grocery, there are many selections of dried noodles, dehydrated ramen as well as freshly made noodles. I found these noodles that were freshly made in the freezer aisle. See picture #1. They take seconds to cook. Any longer, it would turn to mush. Once the noodles were heated through and loose in a pot of boiling water, quickly drain out the water using a sieve. If you want to be extra special, add a tiny drizzle of sesame oil onto noodle and toss. Place onto a noodle bowl.

Next, arrange your desired toppings on top of the noodle in the bowl. Don't forget to add the char siu! or the marinated egg! or the thinly sliced konbu! Additionally, I added sweet corn, seaweed and green onion. Set your bowl aside.
Last but not least!!!! The broth!!
In a clean pot, add 1 cup dashi stock, 1 and a bit more cup of the pork stock. You should have just under 3 cups of liquid. Bring to a soft boil. If you do not have miso paste (purchase from asian grocery) you can skip this step and simply pour the hot broth over top of the noodle bowl. If you do have miso, a soon as the broth is at a soft boil, take out 1 tsp of miso paste and slowly whisk in the paste until there are no lumps of miso. Once miso is dissolved, your miso broth is ready to be poured over top of the ramen!! Enjoy!! Since this was painstakingly homemade, it was super "oiishi"!!! (delicious in Japanese. :) )


I should mention, the egg was at its yummiest after marinating in the sauce. So good it deserved a single frame. Try it! I personally think this version taste better than our traditional Chinese Herbal tea eggs. :D the bit of brown sugar added to the marinade really picked it up.
 Good to the last drop! Since the broth is homemade, go ahead and drink up! Oiishi!!
First, lets make some toppings. :)
Marinated soft boiled egg
In a small sauce pan, add 1/4 cup of water, 3-4 tbsp of soya sauce, 1 1/2 tbsp of brown sugar, 1 tbsp of mirin and a green tea bag. Bring all ingredients to a soft boil and turn of the heat. The purpose of this is to cook out the alcohol of the mirin and melt the sugar. Set aside pan and allow to cool with the tea bag still inside.
In another pot, place 4 eggs in a pot of cold water, heat until boiling and turn of the heat. Cover for 8 minutes. (no more than that!) and quickly dump eggs in a cold bath or rinse in cold running water to immediately cool down. Peel out the shells, rinse the eggs to ensure no shells remain and pat dry.
Pour the sauce in a sandwich bag and drop of the eggs in and allow the eggs to marinate for at least several hours.
This is my version :D and it was delicious. :D

Japanese style Char Siu
Char Siu is originally a chinese dish but the Japanese has adapted a different version. Although it is safe to say nothing beats the chinese version, I am still determine to make the Japanese version. Which is a completely different in taste and style.
First, heat a flat pan to high heat. (remember to turn on the vent!) While the pan is heating, pat dry your slices of pork belly. You can get this at any asian grocer. Once the pan is hot, brown both sides of pork. Salt and pepper. Brown less than 2 mins each side and place on paper towel plate. Repeat process until all pork is browned. Allow pork slices to cool down enough to handle and cut into slices. Set aside.

Lets make a broth! This is where the pork will spend some quality time. :D
In a pot, add 3-4 cups of water, throw in the 3-4 stalks of green onion, 1 tbsp of ginger, 2 crushed cloves of garlic, 1 tbsp each of mirin and soya sauce. Heat. Once the liquid is boiling, turn to low heat, the lowest level on your stove. Add your sliced pork into this bath. :) Place a heavy bowl on top of pork. Cover pot and allow to simmer on low heat for 2hrs.


Next, lets make....
Dashi stock!
I am aware there is a more convenient way of making dashi stock with the freeze dry "Hondashi." Problem is, the second ingredient is MSG! While I have no problem eating food that uses MSG (it is truly unavoidable with chinese food at restaurants!) I believe my personal kitchen should be free of MSG. Control the controllable. So no "Hondashi" for me thank you very much! While this traditional method of making dashi is considerably more expensive, I truly believe in pure flavours.
You will need to go to your asian grocery and purchase a pack of "Konbu" - a type of seaweed and package of "Bonito flakes" Be sure to purchase product of Japan! There are less expensive version made in China.... but personally, if I am going out of my way to make this broth, better to use quality ingredients.


Take out 1 konbu from package, cut in half and soak in warm water (about 3 cups) for at least 1hr. The konbu will expand and release the wonderful flavour of the sea. :) smell it! After 1hr, take out the konbu and place onto cutting board to cut into thin strips and set aside. Pour the konbu water into a clean pot and heat until liquid is at soft boil. Next, add one package of bonito flakes (about 1 hand full) and stir. While the liquid is simmering, prepare a sieve, place over a bowl. You will need to place a paper towel on the sieve. Simmer the liquid for about 2-3 mins and slowly pour liquid over the paper towel sieve. The towel will catch all the bonito flakes. and tada! You have made dashi stock! This stock is the base for many Japanese dishes. :D The flavour is quite unique and delicious on its own. Kinda like a full body clear fish stock. :D (no msg too!)
Oh we are getting closer to that bowl of ramen!
Let's boil the noodles! Honestly you can use any noodles you wish if you don't wish to splurge on the more expensive pre-made ramen noodles. At the asian grocery, there are many selections of dried noodles, dehydrated ramen as well as freshly made noodles. I found these noodles that were freshly made in the freezer aisle. See picture #1. They take seconds to cook. Any longer, it would turn to mush. Once the noodles were heated through and loose in a pot of boiling water, quickly drain out the water using a sieve. If you want to be extra special, add a tiny drizzle of sesame oil onto noodle and toss. Place onto a noodle bowl.

Next, arrange your desired toppings on top of the noodle in the bowl. Don't forget to add the char siu! or the marinated egg! or the thinly sliced konbu! Additionally, I added sweet corn, seaweed and green onion. Set your bowl aside.
Last but not least!!!! The broth!!
In a clean pot, add 1 cup dashi stock, 1 and a bit more cup of the pork stock. You should have just under 3 cups of liquid. Bring to a soft boil. If you do not have miso paste (purchase from asian grocery) you can skip this step and simply pour the hot broth over top of the noodle bowl. If you do have miso, a soon as the broth is at a soft boil, take out 1 tsp of miso paste and slowly whisk in the paste until there are no lumps of miso. Once miso is dissolved, your miso broth is ready to be poured over top of the ramen!! Enjoy!! Since this was painstakingly homemade, it was super "oiishi"!!! (delicious in Japanese. :) )


I should mention, the egg was at its yummiest after marinating in the sauce. So good it deserved a single frame. Try it! I personally think this version taste better than our traditional Chinese Herbal tea eggs. :D the bit of brown sugar added to the marinade really picked it up.


