Water chestnuts are aquatic vegetables, grown underwater in muddy marshes. It is by far my favorite veg to consume, crispy, clean, slightly sweet and refreshing, especially delicious when you are not the one preparing it!!
 |
| water chestnuts washed |
Just so you have an idea of how this soup will turn out, check it out :) It is as flavourful, refreshing as it looks:)

1 and a bit pound of pork bones
1 and a bit pound of water chestnuts
2 chayote squash
1 carrot
1 bunch of watercress leaves
3 dried longan
2 dried honey dates
1 tbsp of dried almonds
Total cook time: just under 3hrs for soup, 1/2hr for pre-boiling pork.
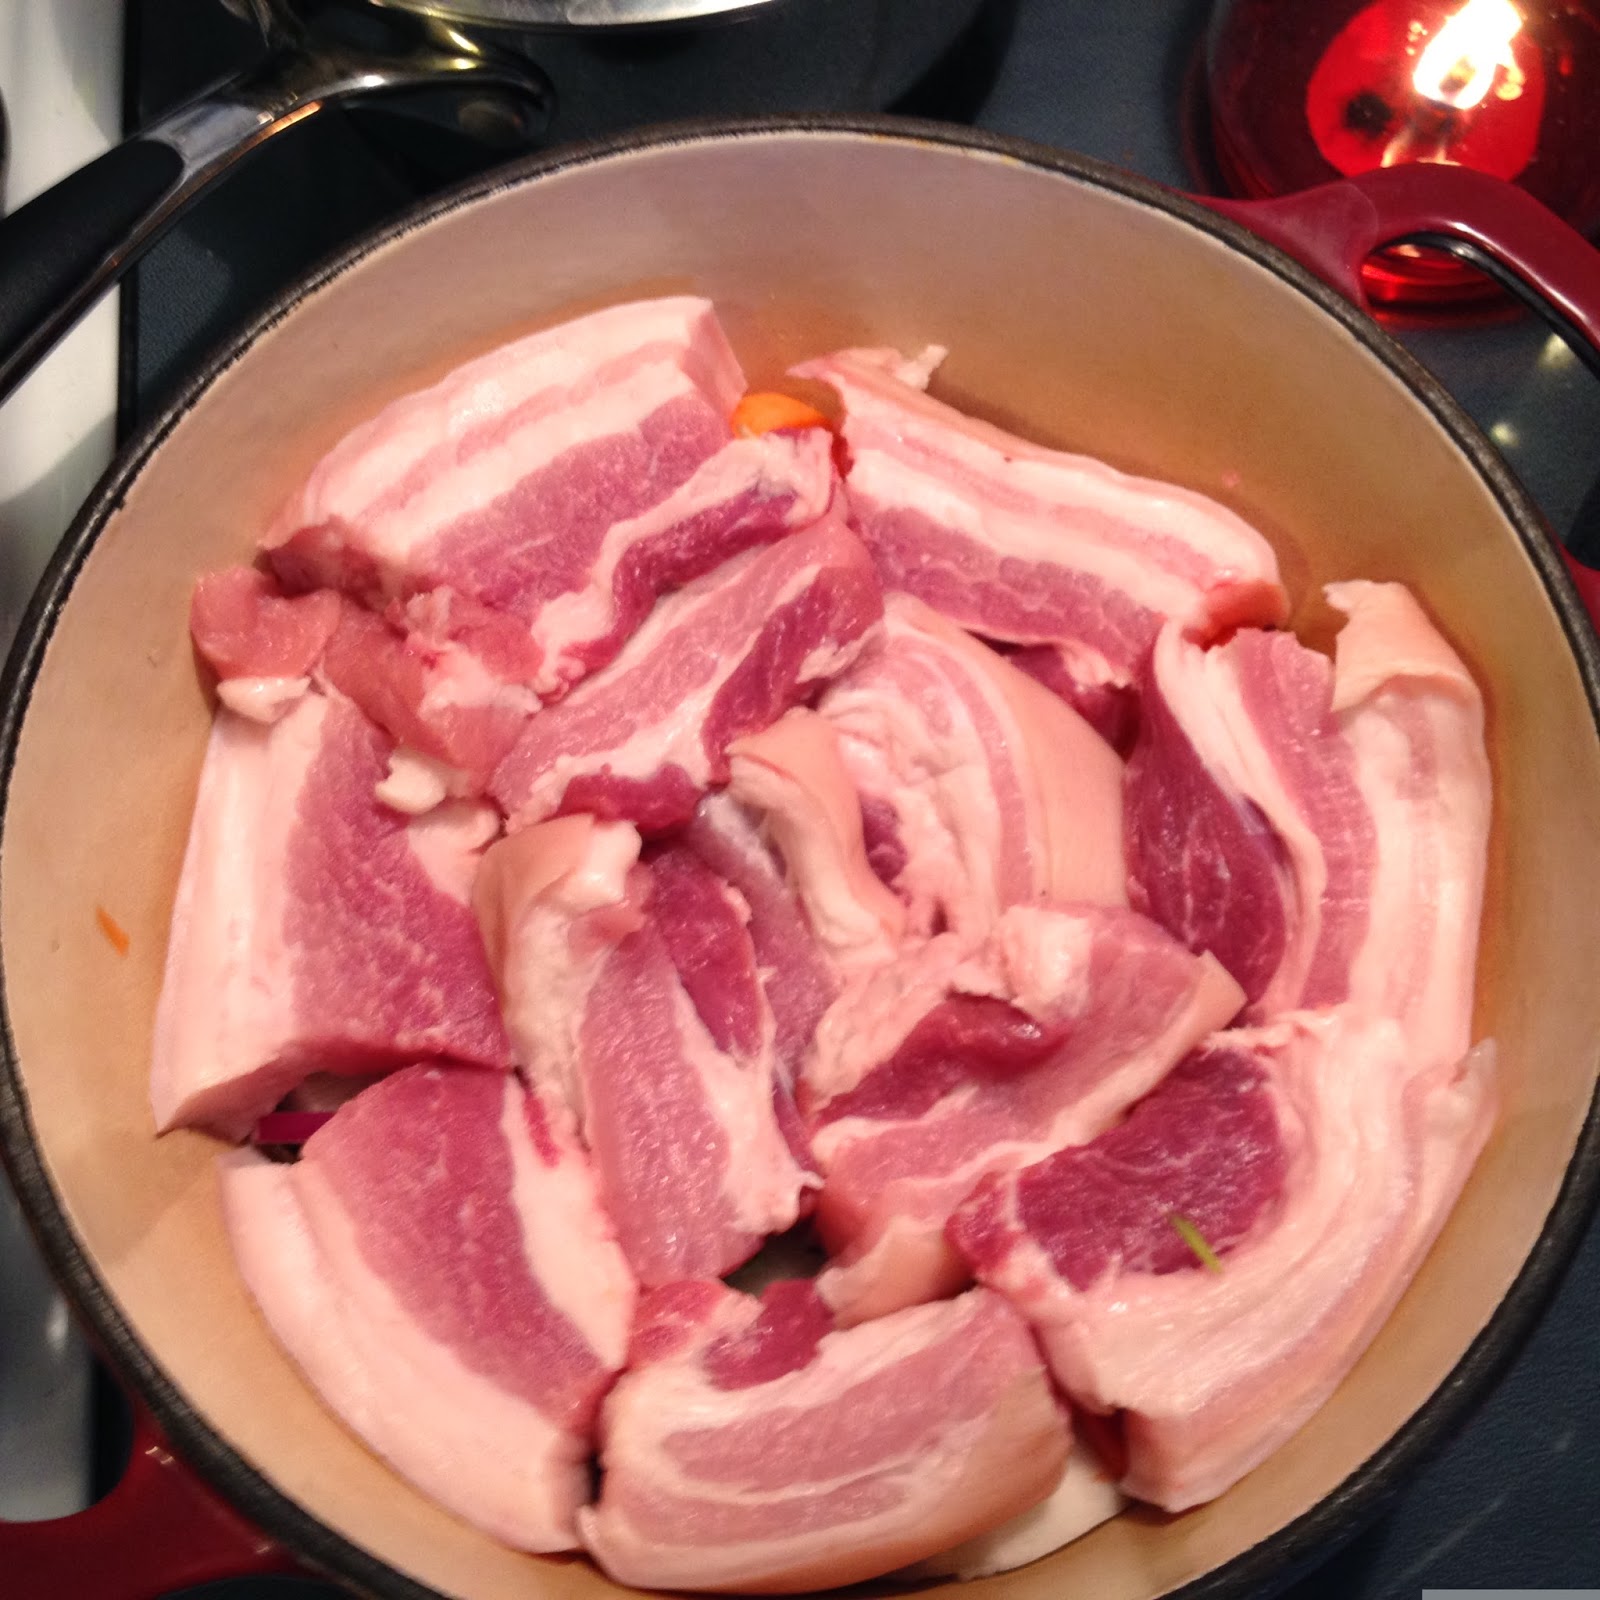
As with my normal chinese soup underlining flavour, I used pork bone because when prepared properly, the stock from the pork bone provides a more robust, flavourful base that compliments well with all other ingredients. When using pork bones to make soup, pre-boiling of the bones is a MUST! This will remove any unwanted fat, dirt and blood. This method also helps by removing the irony taste of blood as well as remove the stinky "pork" flavour.
In a soup pot, fill half-way with cold water and return to stove on medium heat. Add your pork bones in the pot right away. By soaking the pork bones in cold water, the irony blood and scums will slowly seep out. Do not cover the pot. Simply allow the water to heat up slowly, giving time for unwanted flavours to surface. As the water slowly heats, it will colour like so. Gross right?

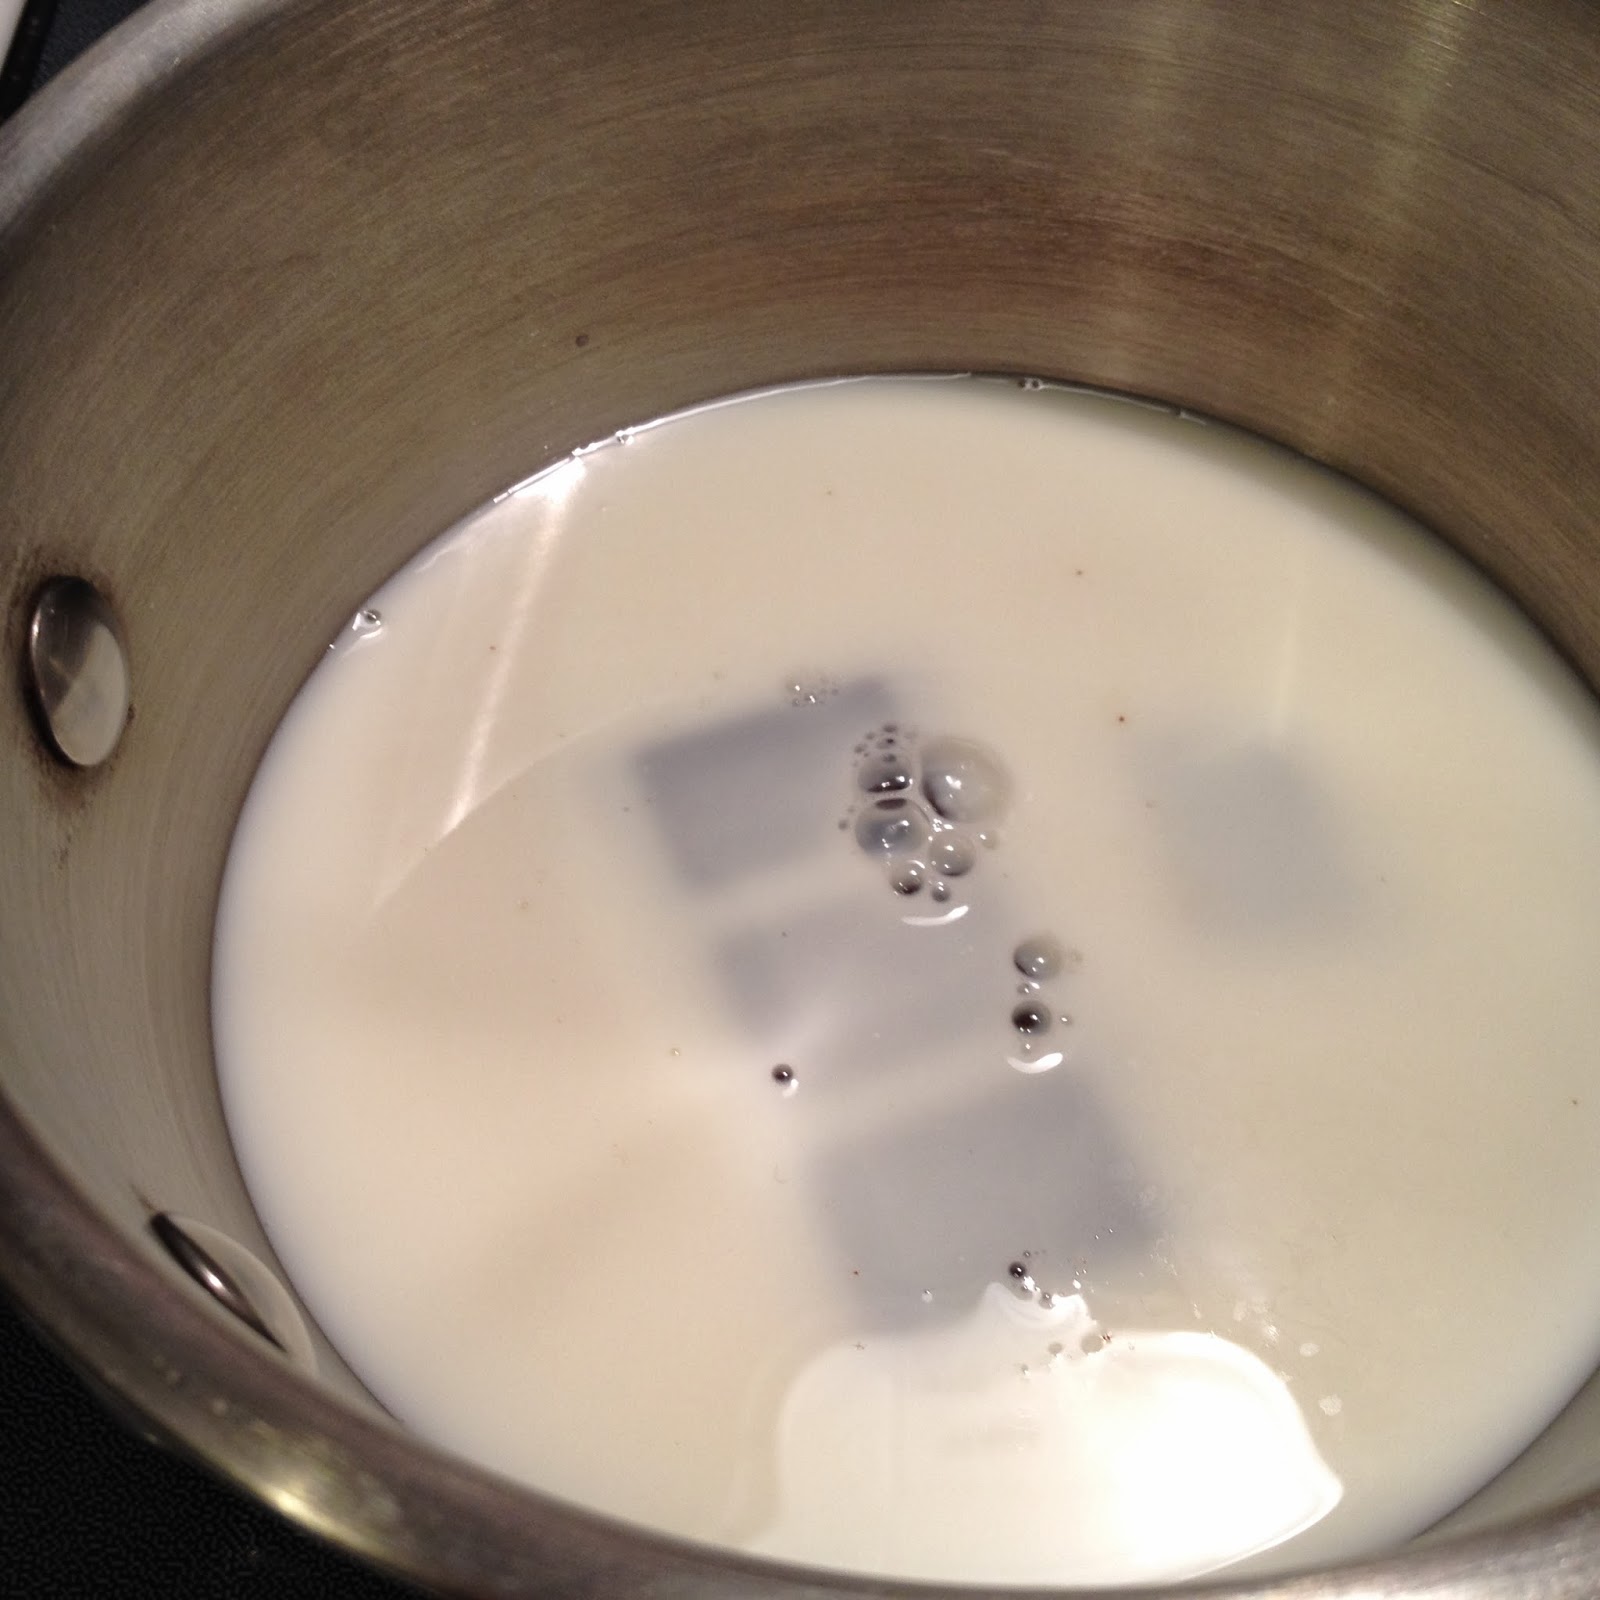
Continue to allow the water slowly heat up until boiling point. This should take about 30 mins. It will look like this afterwards. Even more gross right? :D

Turn off heat and dump all contents in the sink. Thoroughly clean the pot with soap, scrubbing away all scums. Once cleaned, fill pot with clean, cold water, half way and return to stove.
Clean the bones thoroughly with cold running water, making sure to rinse away any loose grits.

Looks clean! The flavour coming out from this will be unreal. :) Set this aside.
Let's prepare the water chestnuts;)

In a big bowl, rinse water chestnuts until the water is clear. This will take at least 10 rinses.
Tip: Use a dash of salt to rinse, this will help draw out any dirt hiding in cervices.
Leave the water chestnuts covered in cold water. Using a pairing knife, peel off skin and allow to soak in the water so they won't brown. Be sure to pair away any brown, soft spots if any.

Allow to soak in water until it is ready for use. Next, lets wash, peel, slice carrot. Cut chestnuts in half. Set aside


Rinse the almonds, honey dates and logan. Add this to the pot of water. Add the pork bones, carrots and chestnuts. Turn heat to medium heat. Allow to heat until just below boiling, then immediately turn heat to low. Cover pot and allow to simmer for 2 hours.

Prepare your chayote, wash, peel and cube into pieces.

Once the soup has been simmering for 2hrs, add the cubed chayote and simmer for another 40mins.
Rinse the watercress in cold water until clean.

The last 10mins, add the watercress to pot. You can turn the heat up slightly to cook the leaves quicker if you wish but only for a few mins :)
Once watercress is cooked, your soup is ready!! Add salt to taste :)
 The water chestnut is not at all overwhelming, in fact, its more like a melody, surfacing smoothly, and just so. Slightly sweet, flavourful and refreshing. This has definately become one of my favorite soups. :)
Enjoy!
Clean the bones thoroughly with cold running water, making sure to rinse away any loose grits.

Looks clean! The flavour coming out from this will be unreal. :) Set this aside.
Let's prepare the water chestnuts;)

In a big bowl, rinse water chestnuts until the water is clear. This will take at least 10 rinses.
Tip: Use a dash of salt to rinse, this will help draw out any dirt hiding in cervices.
Leave the water chestnuts covered in cold water. Using a pairing knife, peel off skin and allow to soak in the water so they won't brown. Be sure to pair away any brown, soft spots if any.

Allow to soak in water until it is ready for use. Next, lets wash, peel, slice carrot. Cut chestnuts in half. Set aside


Rinse the almonds, honey dates and logan. Add this to the pot of water. Add the pork bones, carrots and chestnuts. Turn heat to medium heat. Allow to heat until just below boiling, then immediately turn heat to low. Cover pot and allow to simmer for 2 hours.

Prepare your chayote, wash, peel and cube into pieces.

Once the soup has been simmering for 2hrs, add the cubed chayote and simmer for another 40mins.
Rinse the watercress in cold water until clean.

The last 10mins, add the watercress to pot. You can turn the heat up slightly to cook the leaves quicker if you wish but only for a few mins :)
Once watercress is cooked, your soup is ready!! Add salt to taste :)

Enjoy!